SUPPORT
Software Release
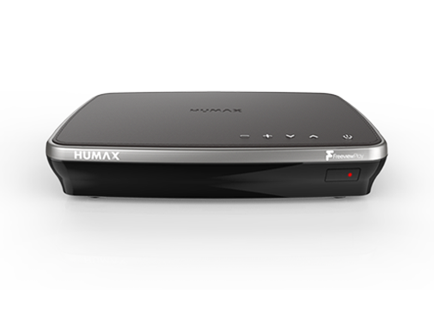
FVP-4000T
### Latest Version: UKTFAE 1.03.54 ###
Software Details
– Application version : UKTFAE 1.03.54
– Loader version : UKTFAE 1.05
– Software Build date : 25 MAY 2022
– Micom version : N/A
– System id : 9010.7D31
New Features and Improvements
-. An additional certificate has been added for Netflix.
Steps to upgrade SW via USB
1. Download the latest software version and save it to an empty USB memory stick. (The file name should be fvp4000t_upgrade.hdf)
2. Please make sure the software is saved in the root of the USB stick.
3. Insert the USB memory stick into FVP-4000T on USB port.
4. Please press Home -> Settings -> System Settings -> System Information -> and press ‘OK’ button on Check New Software.
5. When the download progress stops it may take up to 5 minutes for it to restart so ‘DO NOT TURN OFF FVP-4000T’
6. To confirm successful update, please go to Home -> Settings – > System Settings -> System Information and check ‘Software Version’
FAQ
LINK TO USER GUIDE FOR FVP-4000T
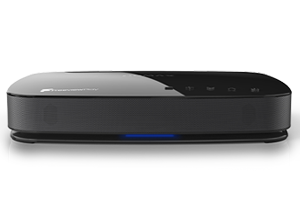
LED INDICATIONS
- Red – Standby
- Blue – On
- Red/Blue - Recording
HOW MANY SIMULTANEOUS TIMERS WITH 3 TUNERS
ONLY ONE TUNER INDICATING STRENGTH/QUALITY READING
HOW TO ACCESS PROGRAMME INFO FOR PROGRAMME CURRENTLY BEING VIEWED
- Press OK (Will open basic channel and programme information)
- Press OK again (will open further programme info and additional opens, recording etc)
MORE ON USING THE GUIDE(EPG)
- The default option for the Guide will always include the available HD and SD channels, pressing + and selecting Change Group will give you the option to view Radio channels or specifically HD channels.
- Holding in the right directional arrow will allow you to choose which of the next seven days EPG data you would like to view (this can also be done using the Jump to Date function, available using the + button), holding in the left directional arrow will allow you to choose from the previous seven days (broadband connection required to view available content).
- The + button will also give you the option for Genre Search, you can choose from the following selection: All, Children's, Drama, Education, Entertainment, Lifestyle, Movie, News & Factual and Sport.
- You can search for specific programmes using the Search button on the remote, it’s icon is a magnifying glass. Results via this method will include upcoming broadcasts and content available On Demand.
HOW TO JUMP FORWARD AND PAGE UP/DOWN IN GUIDE
CREATING AND ACCESSING YOUR FAVORITE CHANNEL LIST
- To create your Favorite channels list you need to press Home/Freeview Play > Settings > Favorite Channels. You use the Up/Down & Ok button to select your Favorite, then press + and choose Add to Favorite. Once you are happy with your list you press the Back button and select the option to Save.
- To access your Favorite list you need to Open the EPG, press the + button and select Change Group, where your Favorite will be listed.
HOW TO RETUNE THE FVP
- Press Home/Freeview Play > Settings > Channel Settings > Automatic Channel Search > Smart/Default
- Smart re-tuning enables you to maintain your recording schedule so you do not have to deal with the inconvenience of scheduling your favorite programmes again. Default will clear your recording schedule.
HOW TO USE SKIP FORWARD/BACK FUNCTION
- Press the OK button to open basic content info > Use the left and right directional arrows to skip forward/backward.
- The skip forward time can be adjusted under Home/Freeview Play > Settings > PVR Settings > Playback Options > Skip Forward Time
REMOTE RECORDING
- Remote Recording is now available via the Humax Live TV App available from both the Android and Apple app store. A long with recording remotely you can also watch live TV and your recordings (FVP & mobile/tablet must be connected to the same network for these two functions)
- You will need to select your preferred settings on the FVP under the Settings > Advanced Settings > Remote Recording. Update Period refers to the period of time the Humax server will be setting remote recordings, we recommend this be set to All Day. Update Interval refers to how often the server and the FVP will communicate, we recommend 30 minutes (meaning the customer will have to set the recording remotely at least 30 minutes in advanced of the programme starting.)
- For accessing Live TV and Recordings via the Live TV App you need to adjust the network sever to your preference, this can be done via Settings > Advanced Settings > Server Management
HOW TO UPDATE SOFTWARE BY IP AND USB
- IP (Broadband required): Home/Freeview Play Button > Settings > System Settings > System Information > Check for New Software > If new version available, press Ok to download > Unit will reboot with SW download on-screen
- USB: Download the software from our website and copy to the root of a USB pen that has been formatted to FAT32. Follow these steps with the USB connected to the FVP: Home/Freeview Play Button > Settings > System Settings > System Information > Check for New Software > If new version available, press Ok to download > Unit will reboot with SW download on-screen.
- If the USB update fails:
Disconnect power from the unit
Insert USB pen
Reconnect power whilst simultaneously pressing the channel down button on top of unit.
Screen should show update progress - you can now release channel down button.
When complete press standby button and remove pen drive.
LINK TO SOFTWARE DOWNLOAD FOR FVP-4000T
FILE TRANSFER USB (SD CONTENT ONLY)
FILE TRANSFER IP (SD CONTENT ONLY)
- Ensure both PC/Laptop and Humax box are on the same network
- Ensure both PC/Laptop have the relevant sharing options turned on (File Share > SAMBA and FTP on the FVP & media share on the PC)
- Open a new folder/file explorer tab on your PC/Laptop
- Type in the IP address of your Humax found in network connection status into the address bar - For example, \\192.XXX.X.XXX *Ensure you have \\ before the IP address*
- Your PC/Laptop should access the internal HDD of the Humax and allow you to copy files off it (Recordings folder)

